
B33_ Ngc 2024_ Alnitak_Alnilam + Mirko Tondinelli + LRGB
B33_ Ngc 2024_ Alnitak_Alnilam
Credit: Mirko Tondinelli
Filters: Optolong LRGB filters
B33_ Ngc 2024_ Alnitak_Alnilam
In this crop of the original image previously posted, we can clearly see the beautiful dark nebula B33, better known as the Horsehead Nebula.
It is located in the constellation Orion, just south of the star Alnitak, the easternmost star of the famous “Orion's Belt”. It is a dark nebula (or absorption nebula) composed of cold dust and dense gas. It appears dark because it blocks the light from the bright emission nebula behind it, called IC 434.
NGC 2024, known as the Flame Nebula, is a spectacular emission nebula. It owes its name to its shape, which resembles a burning fire, with dark veins of dust cutting through the bright central glow. The nebula glows because the intense ultraviolet radiation from Alnitak ionises the hydrogen gases in the cloud. When electrons recombine with ionised hydrogen, they emit light that gives the nebula its characteristic reddish colour in long-exposure images.
Alnitak, a blue supergiant, is fundamental to astrophotography of the region because its intense ultraviolet radiation ionises the gases of the nearby Flame Nebula (NGC 2024), causing it to glow. In addition, its position serves as a guide for locating the Horsehead Nebula (B33), which stands out against the emission nebula IC 434 located just south of Alnitak.
Alnilam (top left) is the central star of Orion's Belt, located between Alnitak and Mintaka. It is the brightest and most massive of the trio, as well as one of the most powerful stars visible in the night sky.
Source: Wikipedia
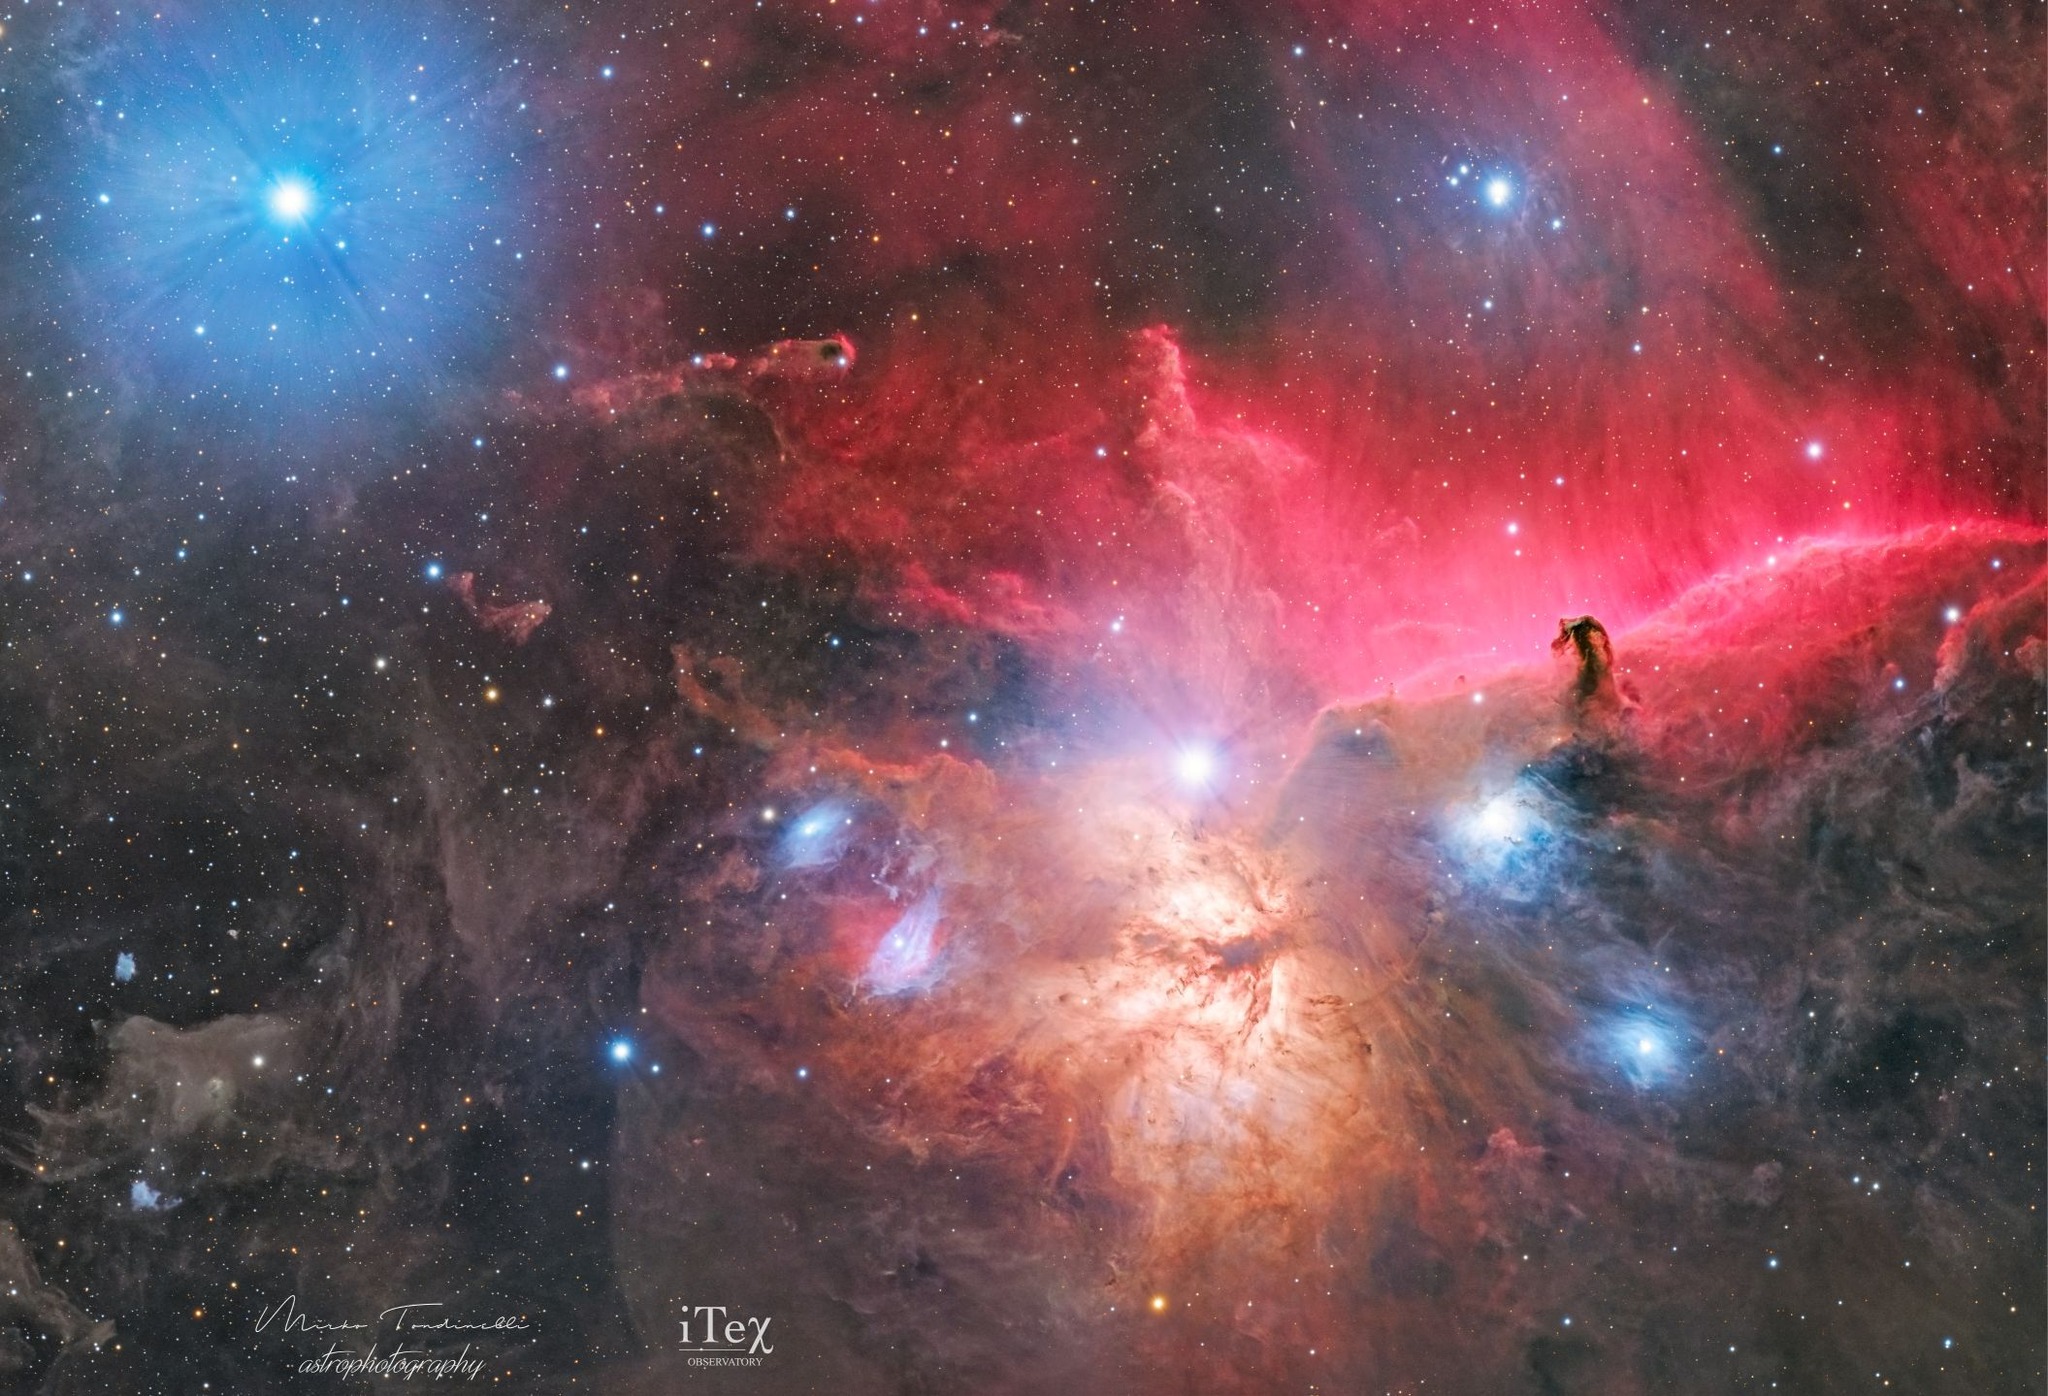
Image taken from the Bortle 1/2 sky in Rockwood, Texas, with our remote telescope.
The processing is classic LRGB.
After processing the individual files with gradient removal (almost zero), I used Channels Combination to create the colour image. Then I ran the SPCC process and calibrated the colour. With Blurxterminator, I set the mode to “Correct only” and adjusted the stars a little. I used Noisexterminator at a very low percentage and removed the stars with Starxterminator. Once I had separated the stars, I was able to stretch with the SetiAstro “Statistical stretch” script. I did the same for the stars with “StarStretch”. Then I moved on to the luminance image (monstrous). Same procedures except for Channels Combination.
This was the PixInsight phase. After saving the three files in 16-bit TIFF, I moved on to Photoshop to continue processing. I set the luminance as ‘brightness’, effectively creating LRGB. I put the stars at the top in ‘desaturate’ mode, making them reappear together with the nebula. Then I started processing with Camera Raw and my workflow (contrast, curves, levels, saturation, denoise).
L: 134 × 300″ = 11 h 10′
R: 43 × 180″ = 2 h 9′
G: 42 × 180″ = 2 h 6′
B: 43 × 180″ = 2 h 9′
TS-Optics 70 mm f/5 Quadruplet
QHYCCD QHY268 M
iOptron HAE29EC mount
Optolong Blue 2"
Optolong Green 2"
Optolong Red 2"
Optolong Luminance 2"
Hope you like it.